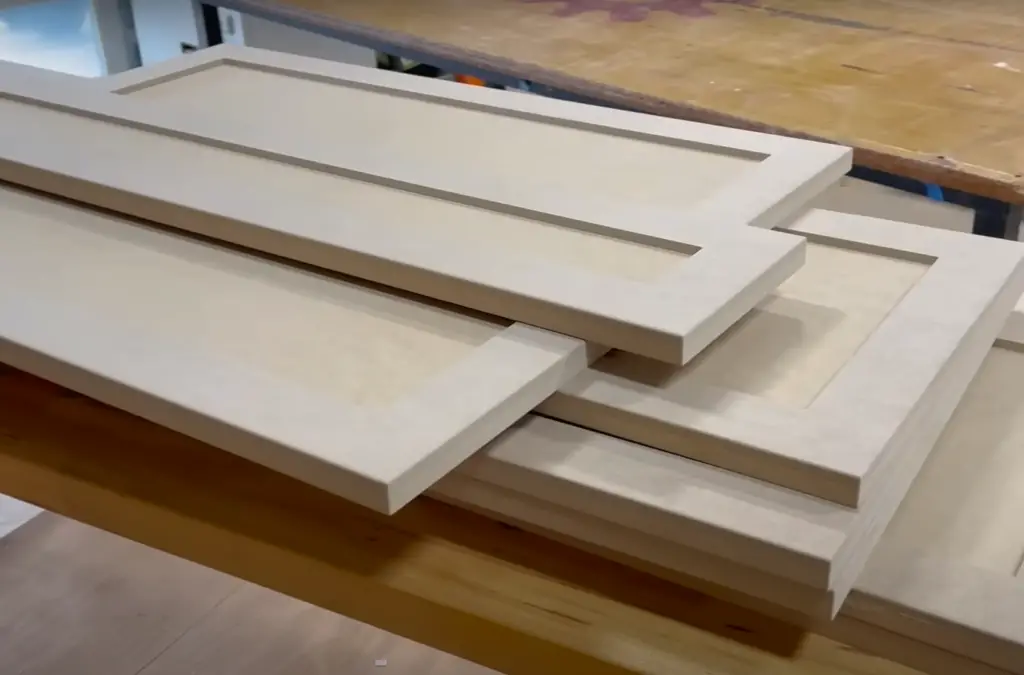
Preparing Pressed Wood Cabinets for Painting

A well-prepared surface is the foundation for a successful paint job. Pressed wood, also known as particleboard or MDF, can be a challenging surface to paint due to its porous nature. However, with the right preparation, you can achieve a smooth and durable finish that will last for years.
Cleaning Pressed Wood Cabinets
Thorough cleaning is essential to remove any dirt, grease, or grime that could interfere with paint adhesion. This step ensures that the paint adheres properly to the surface.
- Use a mild detergent and warm water to wipe down the cabinets.
- Avoid using harsh chemicals or abrasive cleaners, as these can damage the surface.
- Rinse the cabinets thoroughly with clean water and allow them to dry completely.
Sanding Pressed Wood Cabinets
Sanding helps to smooth out the surface and create a better grip for the paint. It also removes any imperfections or raised grain that could show through the paint.
- Start with a coarse-grit sandpaper (80-120 grit) to remove any old paint or varnish.
- Progress to a medium-grit sandpaper (120-180 grit) to smooth out the surface.
- Finish with a fine-grit sandpaper (220-400 grit) to create a smooth, even surface.
Removing Existing Finishes
If your cabinets have a previous finish, you’ll need to remove it before painting.
- For varnish, use a chemical stripper following the manufacturer’s instructions. Be sure to wear gloves and work in a well-ventilated area.
- For paint, you can use a paint scraper or a sanding block with coarse-grit sandpaper. Use a heat gun to soften the paint before scraping or sanding.
- After removing the old finish, clean the surface thoroughly with a damp cloth to remove any residue.
Filling Gaps, Holes, and Imperfections
Pressed wood can often have gaps, holes, or imperfections. Filling these with wood filler creates a smooth, even surface for painting.
- Choose a wood filler that is compatible with pressed wood.
- Apply the filler using a putty knife, pressing it firmly into the gaps or holes.
- Let the filler dry completely according to the manufacturer’s instructions.
- Sand the filler smooth using a fine-grit sandpaper.
Applying Primer to Pressed Wood Cabinets
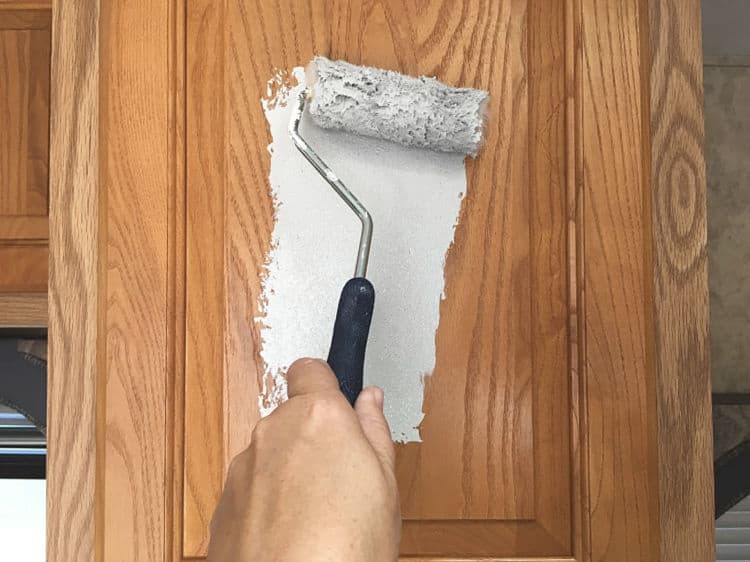
Primer creates a smooth, even surface for the paint to adhere to. It also helps to seal the pores of the pressed wood, preventing the paint from absorbing into the wood.
- Choose a primer that is specifically designed for pressed wood.
- Apply the primer using a brush, roller, or spray gun.
- Let the primer dry completely according to the manufacturer’s instructions.
- Sand the primer lightly with fine-grit sandpaper to create a smooth, even surface.
Choosing the Right Paint for Pressed Wood Cabinets: How To Paint Pressed Wood Kitchen Cabinets

Painting pressed wood kitchen cabinets requires careful consideration of the paint type to ensure a durable and long-lasting finish. Choosing the wrong paint can lead to peeling, chipping, and other issues, especially in a high-traffic area like a kitchen.
Types of Paint for Pressed Wood Cabinets
Choosing the right paint is crucial for a successful kitchen cabinet makeover. Different types of paint offer varying levels of durability, adhesion, and finish, making it essential to select the best option for pressed wood cabinets.
- Acrylic Latex Paint: This is a popular choice for kitchen cabinets due to its ease of application, fast drying time, and low odor. It also offers good adhesion and durability, making it suitable for high-traffic areas. However, it may not be as resistant to moisture as other options, so it’s important to apply a sealant for added protection.
- Oil-Based Paint: Oil-based paint is known for its durability and resistance to moisture, making it an excellent choice for kitchen cabinets. It also provides a smooth, hard-wearing finish. However, it takes longer to dry and has a strong odor, requiring proper ventilation during application.
- Epoxy Paint: Epoxy paint is highly durable and resistant to moisture, making it ideal for kitchen cabinets that experience frequent spills or moisture exposure. It creates a hard, non-porous surface that is easy to clean. However, epoxy paint can be challenging to apply and requires proper preparation to ensure a smooth finish.
- Chalk Paint: Chalk paint offers a unique matte finish and is easy to apply. It’s a popular choice for achieving a vintage or farmhouse look. However, chalk paint is not as durable as other options and may require additional layers of sealant for protection.
Importance of Adhesion and Durability
Pressed wood is a porous material, making it essential to choose a paint with good adhesion and durability. The paint should adhere firmly to the surface, preventing it from peeling or chipping over time. This is especially important in a kitchen, where cabinets are exposed to moisture, grease, and frequent use.
Benefits of High-Quality Paint
Investing in high-quality paint designed specifically for kitchen cabinets offers several benefits:
- Improved Durability: High-quality paints are formulated with resins and pigments that enhance their durability, ensuring a long-lasting finish that can withstand the wear and tear of everyday use.
- Enhanced Adhesion: These paints are designed to adhere strongly to various surfaces, including pressed wood, providing a secure bond that prevents peeling or chipping.
- Superior Coverage: High-quality paints offer excellent coverage, requiring fewer coats to achieve a smooth, even finish. This saves time and effort during the painting process.
- Easy Cleaning: Many high-quality paints are formulated for easy cleaning, making it simple to wipe away spills and stains from your kitchen cabinets.
Paint Finishes for Kitchen Cabinets, How to paint pressed wood kitchen cabinets
The paint finish you choose can significantly impact the look and feel of your kitchen cabinets. Different finishes offer varying levels of sheen and durability:
- Matte Finish: Matte finishes provide a flat, non-reflective surface that hides imperfections well. However, they are less durable than other finishes and can be more susceptible to stains.
- Satin Finish: Satin finishes offer a soft sheen that provides a balance between durability and a subtle sheen. They are easy to clean and resist stains better than matte finishes.
- Semi-Gloss Finish: Semi-gloss finishes have a noticeable sheen that reflects light, creating a more polished look. They are highly durable and easy to clean, making them a popular choice for kitchen cabinets.
- Gloss Finish: Gloss finishes provide the highest sheen, reflecting the most light. They are extremely durable and easy to clean but can highlight imperfections in the surface.
Choosing the Right Paint Color
Selecting the right paint color for your kitchen cabinets is a crucial decision that can significantly impact the overall look and feel of your kitchen. Consider the following factors:
- Lighting: Natural light can make colors appear brighter, while artificial light can make them appear darker. Consider the lighting in your kitchen when choosing your paint color.
- Existing Decor: Choose a paint color that complements your existing kitchen decor, such as countertops, backsplash, and flooring.
- Personal Preferences: Ultimately, the best paint color is one that you love and makes you feel happy in your kitchen. Don’t be afraid to experiment with different colors and shades until you find the perfect one.
Painting Techniques for Pressed Wood Cabinets

Now that you have prepped your cabinets and chosen the right paint, it’s time to dive into the actual painting process. This is where your patience and attention to detail will pay off, resulting in a professional-looking finish.
Painting Techniques for a Smooth Finish
The key to a successful paint job on pressed wood cabinets is achieving a smooth, even finish. This involves careful preparation, proper painting tools, and a methodical approach.
- Start with a Clean Surface: Before you start painting, ensure the cabinets are completely clean and free of dust, grease, and any leftover sanding residue. Wipe them down with a damp cloth and allow them to dry thoroughly.
- Prime for a Strong Bond: Priming is essential for pressed wood cabinets as it creates a smooth, even surface that the paint can adhere to better. Choose a primer specifically designed for wood, and apply it with a brush or roller in thin, even coats, allowing each coat to dry completely before applying the next.
- Use High-Quality Paint: Opt for a high-quality paint formulated for cabinets, as it offers durability, adhesion, and a smooth finish. Consider using a paint specifically designed for pressed wood for optimal results.
- Choose the Right Brush and Roller: A good quality brush with soft bristles is essential for applying paint smoothly and evenly, especially on intricate details. A roller with a nap suited for your paint will ensure smooth coverage on larger surfaces.
- Apply Thin Coats: Avoid overloading your brush or roller with paint, as this can lead to drips and uneven coverage. Apply thin, even coats, allowing each coat to dry completely before applying the next.
- Minimize Brushstrokes: To prevent visible brushstrokes, use long, smooth strokes in the direction of the wood grain. For a seamless finish, blend each stroke slightly into the previous one.
- Avoid Drips and Runs: If you do experience drips or runs, use a clean, damp cloth to gently smooth them out before the paint dries completely.
Painting Intricate Details and Edges
Pressed wood cabinets often feature intricate details and edges that require special attention. Here are some techniques for painting these areas effectively:
- Use a Small Brush for Detail Work: For painting intricate details, such as moldings, trim, and cabinet doors, use a small, angled brush with fine bristles. This allows for precise control and avoids smudging or overlapping.
- Use Masking Tape for Clean Lines: When painting edges or trim, use masking tape to create clean lines. Apply the tape carefully, ensuring it adheres securely to the surface. After painting, remove the tape while the paint is still slightly wet to avoid pulling off the paint.
- Apply Paint to Edges with a Light Touch: When painting edges, apply paint with a light touch, using a small brush or roller. Avoid overloading the brush or roller, as this can cause the paint to build up and create an uneven finish.
Drying Time and Ventilation
Proper drying time and ventilation are crucial for achieving a durable and flawless finish.
- Allow Adequate Drying Time: Follow the paint manufacturer’s instructions for drying time. Generally, allow each coat to dry completely before applying the next.
- Ensure Proper Ventilation: Ensure adequate ventilation during and after painting to prevent paint fumes from accumulating. Open windows and doors, and use fans to circulate air.
How to paint pressed wood kitchen cabinets – Painting pressed wood kitchen cabinets can be a real game-changer for your space, man! You gotta prep that surface right, though, so it looks smooth and lasts. Speaking of smooth, check out this black and white striped bedroom – that’s some serious style! Anyway, back to the cabinets, you’ll want to use a good primer and then a high-quality paint for a finish that’ll stand up to everyday use.
Painting pressed wood kitchen cabinets is a great way to give your kitchen a fresh look, but it’s important to prep the surface properly. You’ll want to sand down any rough spots and fill in any cracks or holes.
Then, you can prime and paint! If you’re looking for some storage solutions, check out the awesome selection of wooden file cabinets at Walmart. They’re perfect for keeping your office organized and looking sharp. Once you’ve got your cabinets looking great, you can move on to other DIY projects, like painting your kitchen backsplash or adding some fun new hardware to your drawers.
